

Accuracy in PatternScan Pro is a chain: printed references, flat placement, a clean photo, a contour that really sits on the line, and a final scale check. This guide walks the whole chain, and its last step, the scale correction, catches what slipped through earlier. No app makes measurements right on its own, but every link in this chain is in your hands.
The four Reference Tiles set the scale of every photo. Your camera lens is corrected too: the PatternScan Pro app knows the camera of most phones, and for photos from your regular camera app that you upload on the desktop, a calibration profile takes over that job. Everything else is in your hands, one link of the chain per step, in the order you work through them.


Print at 100% scale, never with “fit to page”, and measure the printout, the reference is your ruler. The print check tool in the reference guide tells you what to measure and the target lengths, and if your printer is off by 0.1 mm or more, it makes a corrected file for you. Replace tiles that are wavy, creased or worn, a bent ruler measures wrong.
Pattern and tiles lie completely flat: smooth the paper, weigh down corners, flatten curling tiles. Place the four tiles about 1 cm from the piece, following its outline, nothing may stick out beyond them. Tile A leads: its arrows point up on the digitized pattern. Waves and distance are the two quiet accuracy killers. Details in the photography guide.

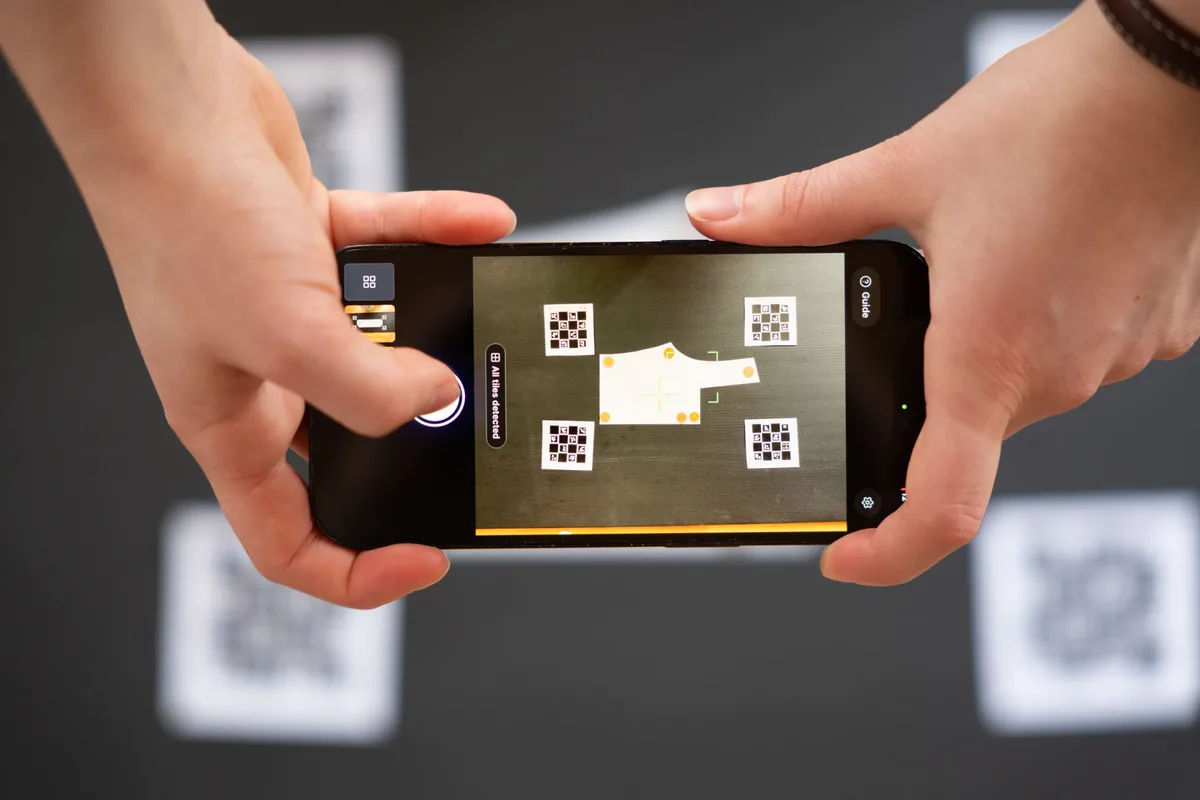
Shoot from directly above at 90°, camera level, in even, diffuse light. In the PatternScan Pro app, wait for “All tiles detected” before you take the picture. Framing, focus and light are covered in the photography guide.
Zoom in and walk the contour: every control point on the line of your pattern, curves shaped with the Bezier handles until they follow the drawn edge. Type exact values where you know them. To lock a fitted length, click its measurement and press L in the field. How every tool works is in the contour editing guide. A contour that sits 1 mm off is a millimeter on every exported edge.
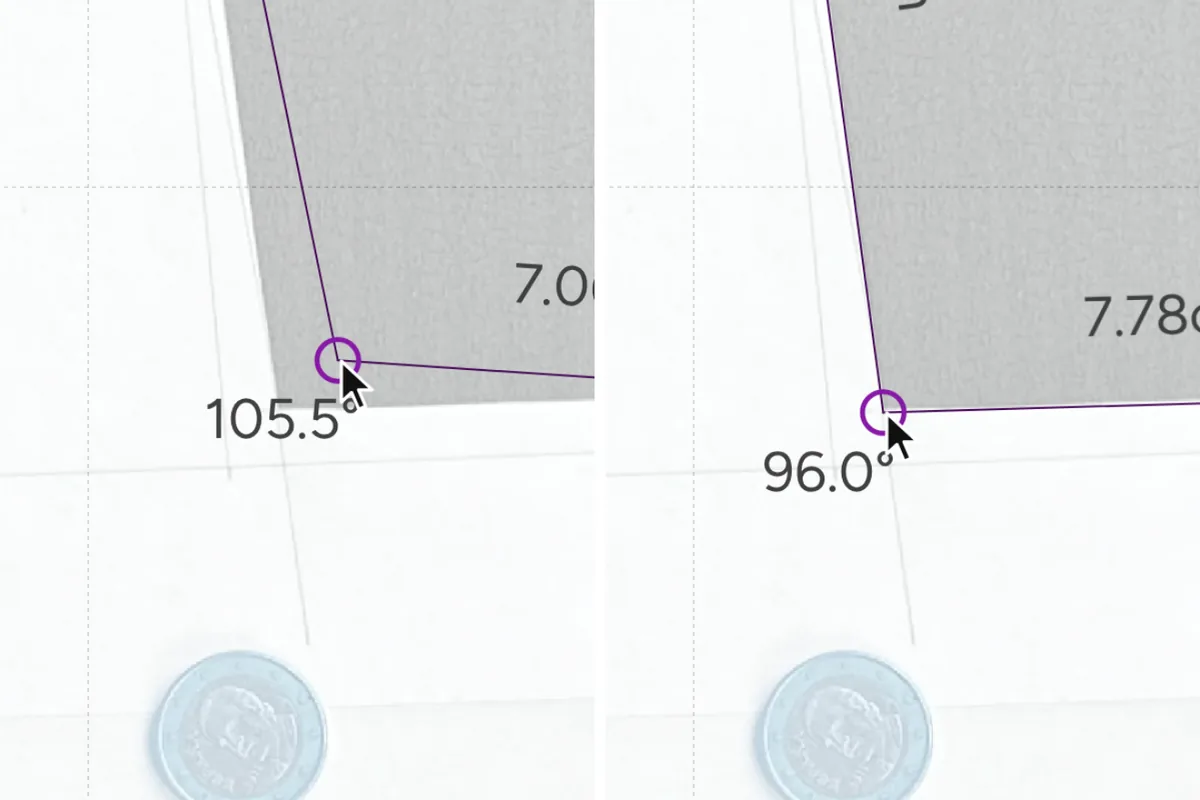

With Measurements switched on (M), every edge shows its length. Lay your ruler along the same edge of the paper original and compare, ideally on two straight edges in different directions. If both match, you are done. If not, the next step fixes it.
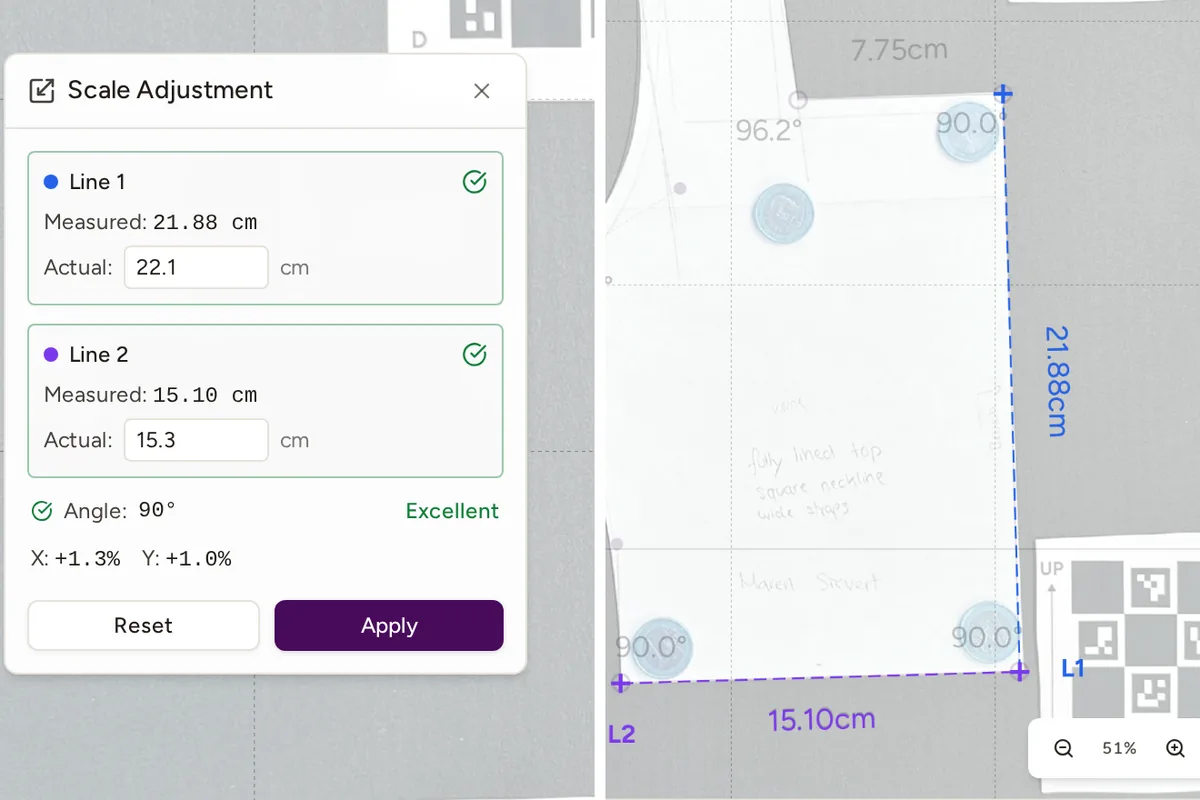
If measurements are off, open Correct scale (shortcut R) as the last step, after the contour work, because the correction scales the whole piece. Draw or select two reference lines along distances you know, make them as long as possible and at least 40° apart, then enter the actual measurements. The tool rates your line pair, corrects even direction-dependent distortion, and refuses corrections above 20%, that points to a measuring mistake rather than a scale problem.
Afterwards measure once more to confirm, and if you had already set a grain line, glance at its angle, a direction-dependent correction can turn it slightly.

Digitize sewing patterns without tracing.
Test PatternScan Pro free for 14 days with the full feature set. You need your smartphone, a printer and one pattern you always wanted digital.
Photograph your paper pattern and get an automatically scaled digital version with PatternScan Pro.
Usage