

A calibration profile tells PatternScan Pro how your camera's lens distorts the picture, so your measurements come out right. Many phones never need one. If yours does, you create it once: print a checkerboard, take 20 shots of it, done. This guide shows the way on your phone first, then briefly on the desktop. The idea is the same on both.
Every lens bends straight lines a little, most of all toward the edges of the picture. A calibration profile measures this once for your camera, and PatternScan Pro corrects it in every photo. On your phone you usually need none: the PatternScan Pro app brings the calibration along for most devices, for example iPhones with a dual camera or LiDAR. If your phone does not provide reliable camera data, the app tells you with Calibration profile required. On the desktop you need a profile when you upload photos from the regular camera app of your phone or from a camera. SVG files import without one.
One profile per setup: another phone, another lens or another zoom level needs its own profile.


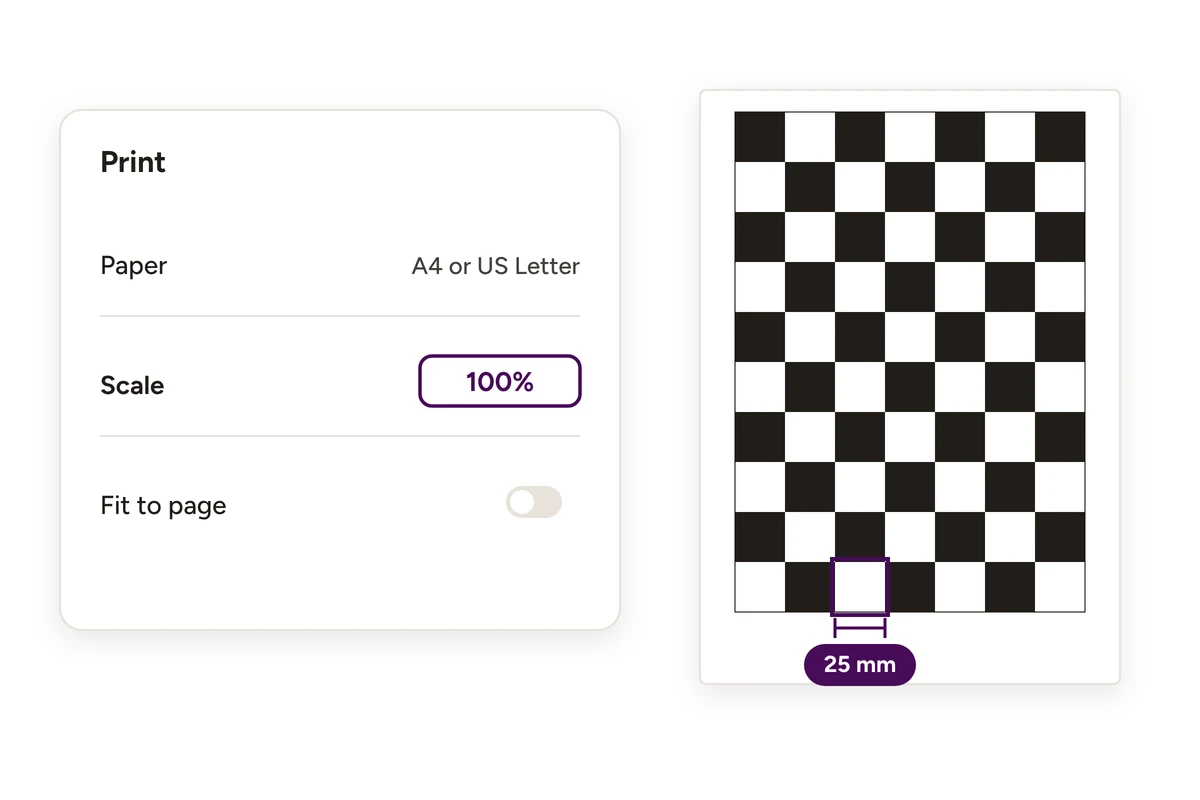
Print the checkerboard for A4 or US Letter from our reference guide, or open it from the assistant: in the app with Download and print the checkerboard template, on the desktop with Download reference. Print at 100% scale, never with “fit to page”. The board has 7 × 10 squares of 25 mm each. Measure one square with a ruler: if it is not exactly 25 mm, the reference guide shows how to fix it.
In the app, open Settings. Start with Test measurement accuracy: the test measures a plain A4 sheet and shows how far your device is off. If the result is good, you are done here. If not, or if the app asked for a profile, tap Create your own calibration profile.

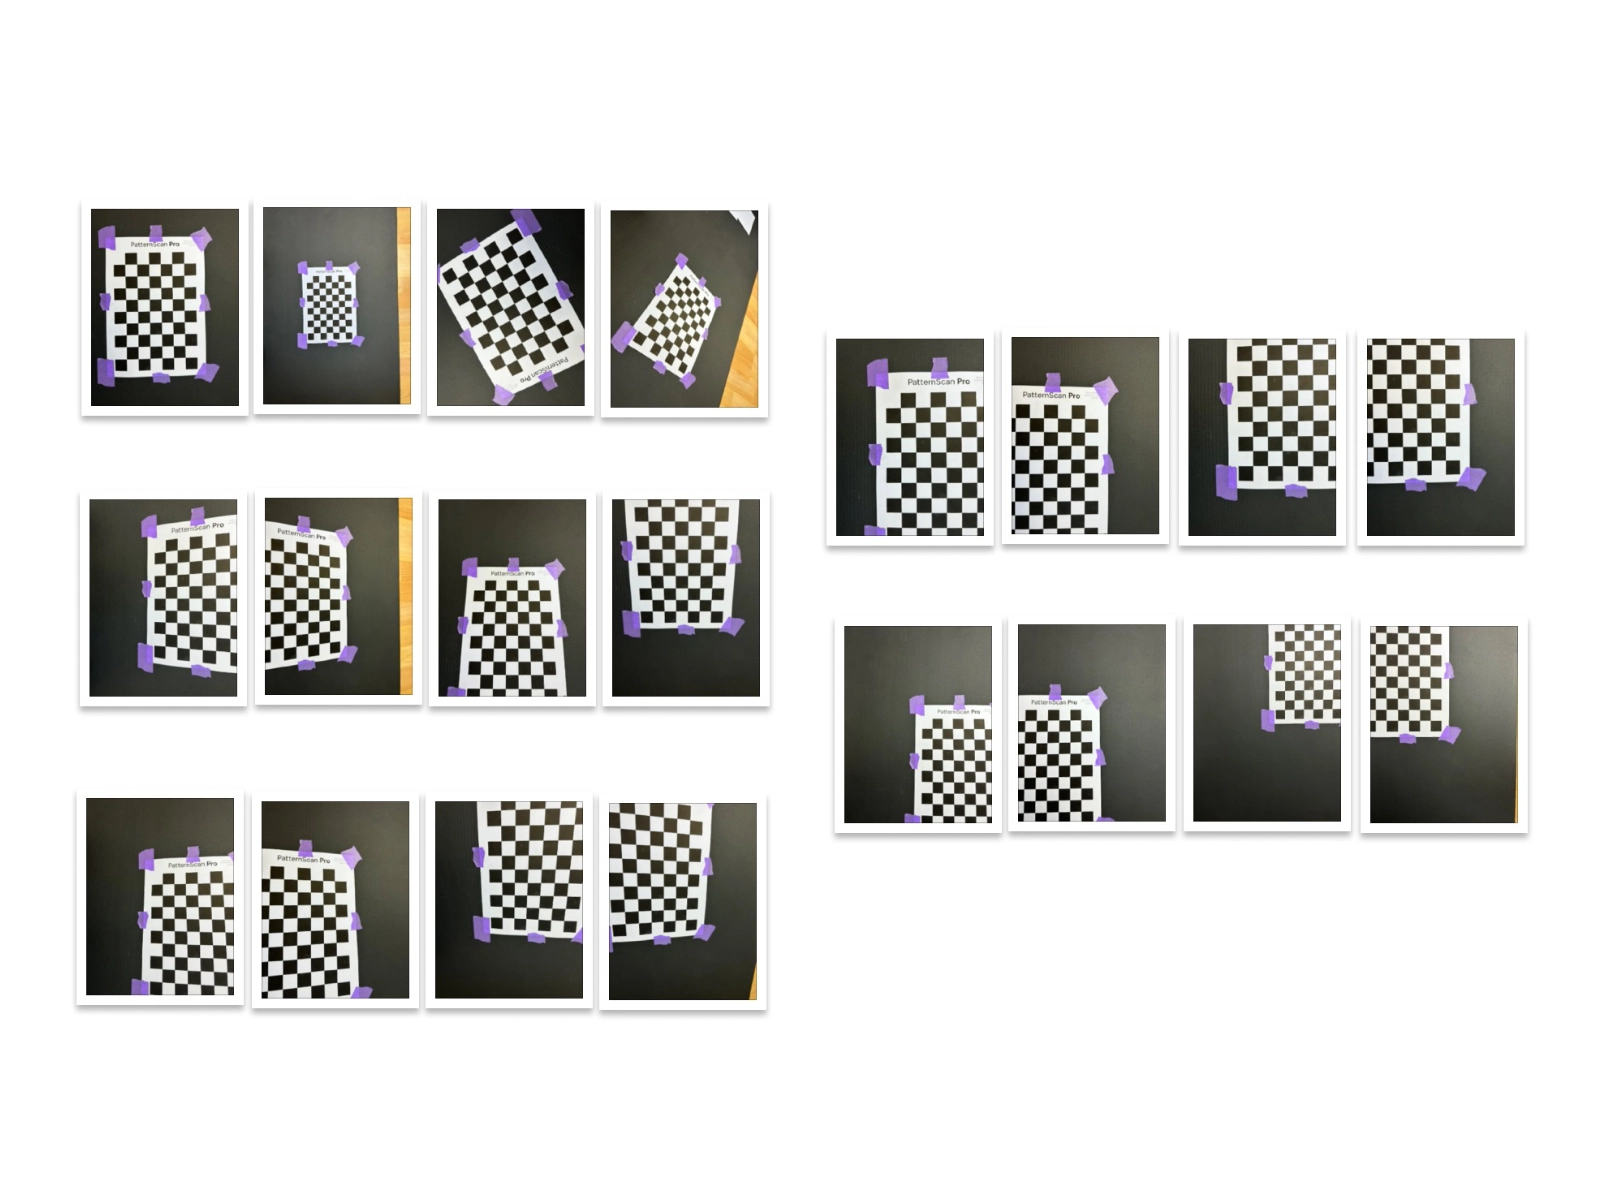
Tape the checkerboard flat to a table, without creases, in natural, even light without harsh shadows. The board stays put, only the phone moves. The green marks show the inner corners that must stay in frame in every shot. For the shots at the edge of the picture, you crop the paper margin and the outer squares off on purpose.
The app guides you through 20 shots. The viewfinder shows where the board belongs, and hints like Move closer or Tilt more help you get there. Each shot is checked on the spot, and only a matching photo unlocks the next target.
Before the edge and tilted shots, a short page explains what changes. These shots matter most, because lens distortion is strongest at the edge of the picture. Tilt the phone clearly to one side so one side of the board looks smaller, instead of rotating the board flat.
After the last shot, give the profile a name you will recognise, for example your phone model, and tap Create profile. PatternScan Pro computes the profile and shows Calibration complete with its quality. The new profile is active right away, you find it in Settings under Active camera profile. Run Test measurement accuracy again to compare.
If the calibration fails, Restart series takes you through the shots once more: pay extra attention to sharp photos this time.
Taking your photos with the regular camera app and uploading them on the desktop? Then create the profile there, with the same checkerboard and the same 20 shots. Click Open, then Desktop Upload, and on the Calibration card choose Create Calibration Profile. Pick Smartphone or DSLR/Camera and name the profile after the camera and its zoom, for example “iPhone 15 Pro 1x”.
The assistant shows the 20 reference shots as examples: recreate them with your camera, always with the same settings, and add them under Upload & Analysis. From 15 images the analysis starts and shows which shots are still missing. Once it says That is enough for a good profile, click Create Profile.

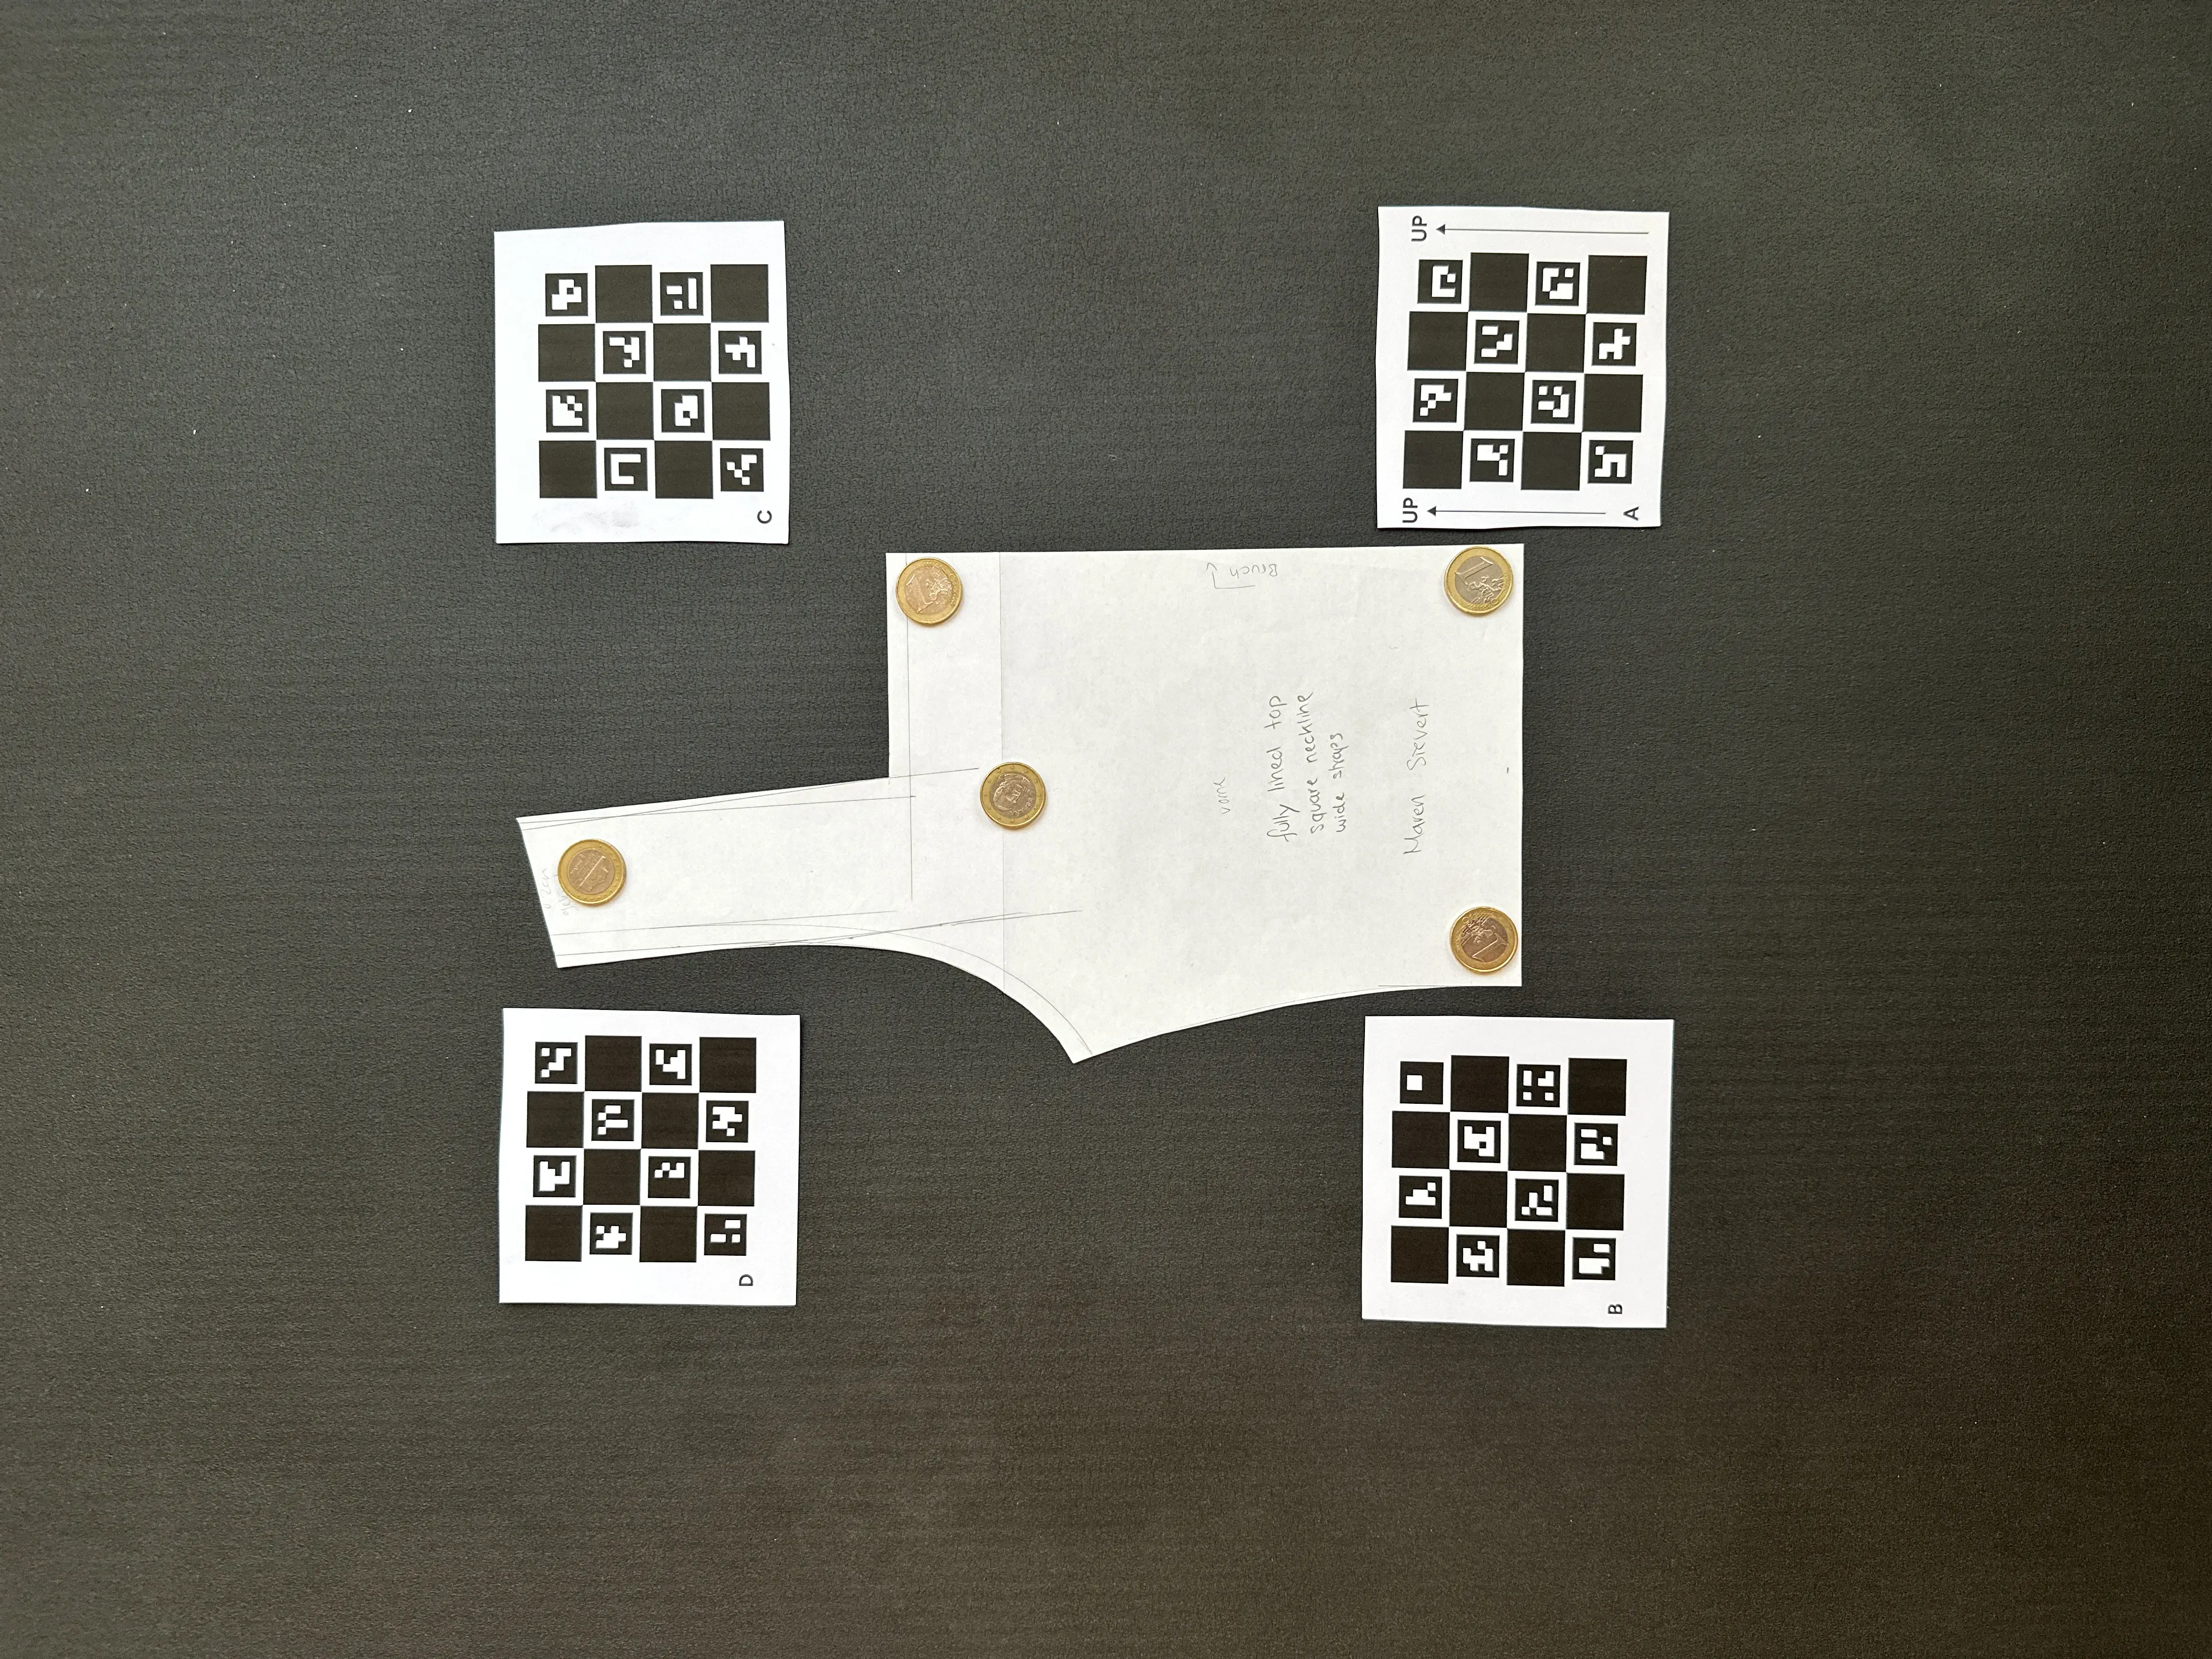
On your phone, the profile is active as soon as it is created, and every capture uses it. On the desktop, pick it on the Calibration card before your upload, it shows Active. Photograph your pattern with the same camera and settings, with the four Reference Tiles around it.
After the import, measure a known length to check the result.
Digitize sewing patterns without tracing.
Test PatternScan Pro free for 14 days with the full feature set. You need your smartphone, a printer and one pattern you always wanted digital.
Photograph your paper pattern and get an automatically scaled digital version with PatternScan Pro.
Usage