
How to Scan Sewing Patterns: Flatbed, Copy Shop or Photo? And How to Get a True-to-Scale File
From a home scanner and the copy shop to an app: which ways there are, what they cost and when a scan becomes a true-to-scale file.

Rasmus Liebscher
Co-Founder & Developer
In short: You can scan sewing patterns in three ways: small pieces on a flatbed scanner at home, whole sheets on a large format scanner at a copy shop, or as a photo with your phone. A scan is only an image, though. You get a true-to-scale file with editable contours, an SVG or DXF, only when you trace it, use a digitizing table, or let an app like PatternScan Pro detect the contour for you.
We have heard this question since day one: “What is the best way to scan my pattern?” Here is an overview of the common ways, with the cost, the effort and the limits of each.
Scanning or digitizing: what is the difference?
A scanner turns your pattern into a raster graphic, an image made of pixels. That is enough for an archive and for printing at full size. For almost everything else you need a vector file: lines you can move, extend and measure without them getting blurry. Pattern CAD, CLO3D, plotters and projectors all work with vectors. The step from image to vector file is called digitizing, and that is where the options differ most.
Way 1: A flatbed scanner at home
Your home scanner, standalone or built into your printer, can do more than you think. Small pieces like collars, cuffs or pockets fit on the glass, usually A4 or US Letter, on some models A3. The lid presses the paper flat, a real advantage over a photo.
How to do it: scan at actual size (100 percent) and at least 300 dpi. Scan larger pieces in sections with about 2 cm (1 inch) of overlap and join them in an image editor afterwards. Put a ruler on the glass too, so you can check the scale later.
The limit: once a piece is much larger than the glass, joining gets tedious, and every seam between sections can add a small offset. For a skirt panel or a trouser leg a flatbed scanner is not a good choice.
Cost: nothing extra if you own a scanner. Result: an image. Good for: single small pieces.
Way 2: A large format scan at a copy shop
Copy shops and plot services have large format scanners that capture whole pattern sheets in one pass, often up to A0 and wider. You bring your sheets, get a PDF or TIFF back and usually pay per sheet or per running meter. Some services accept patterns by mail.
That pays off for a one-time archive, for example vintage multi-size sheets you want to save before the paper ages further. It gets expensive when new patterns keep coming, and your originals are out of the house in the meantime. Here too: you get an image, not contours.
Cost: per sheet. Result: an image. Good for: large sheets and a one-time archive.
Way 3: Photograph and trace
The zero-cost way: photograph the pattern with a tape measure in the picture, open the photo in a vector program and trace the contour by hand. Inkscape is free, Illustrator and Affinity work the same way.
It works, but it takes a lot of time. And two problems stay with you. First, perspective: a camera held slightly at an angle makes one side of a piece shorter. Second, the lens: every phone lens distorts a little toward the edges. You barely see either in the photo, and you notice both only when you sew the pieces together.
Cost: nothing but time. Result: vectors, as accurate as your photo and your hand. Good for: the occasional single piece.
Way 4: The digitizing table
The industry classic. You trace every pattern piece point by point with the digitizing puck, and the table records the coordinates. It is precise and proven, and it is exactly what production floors pay for: new tables usually cost well into four figures, used ones are cheaper but often come with old software and driver trouble. Add permanent floor space and training time.
If you digitize many pieces every day in production, a table is still a legitimate choice. For an atelier or a design studio it is usually oversized.
Cost: four figures. Result: vectors. Good for: production with many pieces a day.
Way 5: A photo with an app and Reference Tiles
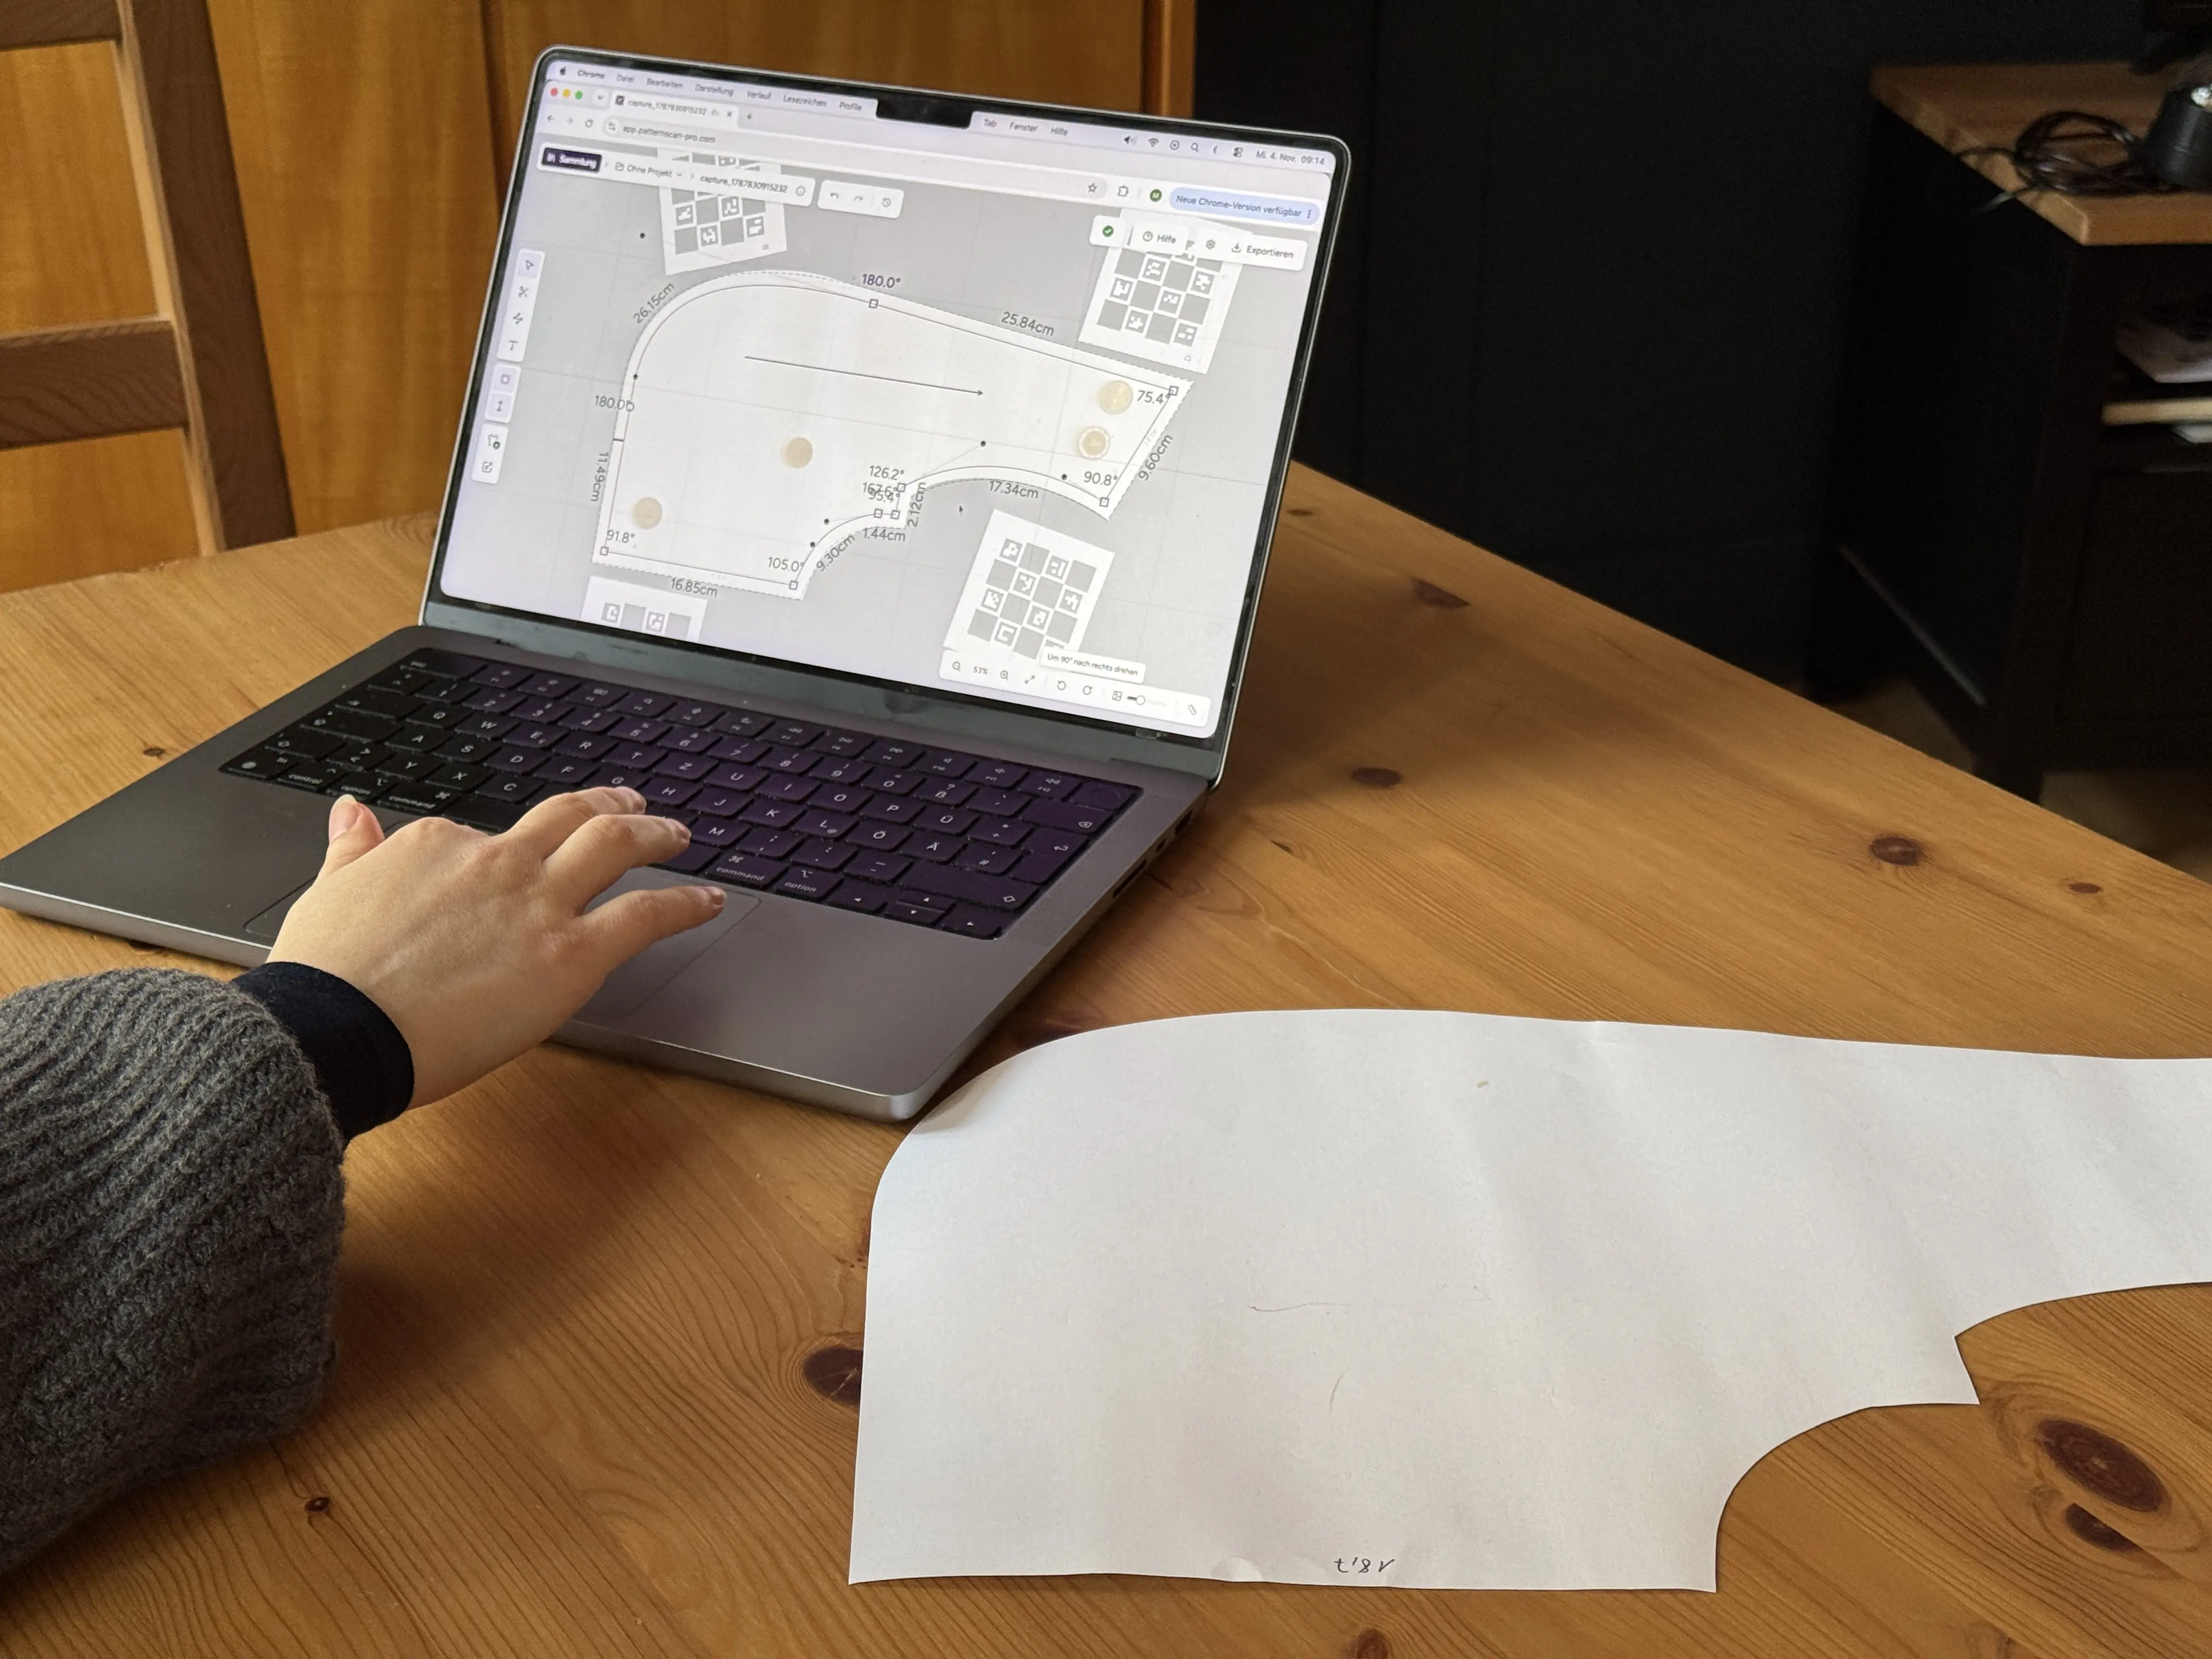
The fifth way uses the camera you already own and takes the two problems of way 3 off your hands. You place four printed Reference Tiles around your cut-out pattern piece and shoot from above. PatternScan Pro detects the contour automatically and exports it at true size in millimeters: as SVG for Illustrator and Inkscape, as DXF for pattern CAD like Grafis, as PACX for CLO3D, or as PNG. You do not have to worry about perspective or the lens: the Reference Tiles take care of perspective and scale, and calibration corrects the distortion of your camera lens. The companion app already includes calibration for most phones. Only for photos from your regular camera app that you upload on your computer do you create a calibration profile once.
When your photo is right, meaning the pattern lies flat, you shoot from directly above and all four Reference Tiles are visible, your digital pattern is accurate to the millimeter. Our guide shows what the ideal photo looks like.
This way has conditions too: for automatic detection the piece has to be cut out. For a multi-size sheet you do not want to cut, you trace the contour in the editor. Scale and export work the same way.
We developed the app because this exact digitizing step kept holding us back with our own patterns. The whole story is here. It still makes me happy every time a photo from the kitchen table ends up as a clean DXF file.
Cost: from 6 euros a month on the yearly plan, 14 days free. Result: vectors accurate to the millimeter. Good for: ateliers, pattern makers, students and archives.
All ways at a glance
- Flatbed scanner: free if you own one. An image, not contours, small pieces only.
- Copy shop: paid per sheet. An image, not contours, good for large sheets and archives.
- Photograph and trace: free but slow. Perspective and lens remain your problem.
- Digitizing table: four-figure purchase. Precise vectors, worth it in production.
- Photo with PatternScan Pro: from 6 euros a month. Vectors accurate to the millimeter, contour detected automatically.
Which way fits your goal?
You only want to preserve your patterns: a copy shop scan or a good photo is enough. How to store paper patterns and files sensibly is on our page Organize sewing patterns.
You want to cut with a projector: you need a file at actual size, ideally as vectors. More on Project sewing patterns.
You work in pattern CAD or CLO3D: then you need DXF or PACX with clean curves, an image will not help you. See Paper pattern to DXF and Patterns for CLO3D.
You want to sell patterns: a printable PDF needs vectors you can label and arrange by size. Paper pattern to SVG shows how to get there.
What each way costs
We deliberately do not quote exact hardware prices, they vary a lot between models and the used market. The order of magnitude is clear anyway: a digitizing table or your own large format scanner is a four-figure purchase before you have digitized a single piece. Copy shop scans cost money again with every new pattern. The app costs 9 euros a month, and you can try it free for 14 days before you decide.
Frequently asked questions
Can I scan a sewing pattern with my phone?
Yes. A phone photo on its own is not true to scale, because perspective and the lens distort the image slightly. PatternScan Pro solves both: four printed Reference Tiles around the piece take care of perspective and scale, and calibration corrects the lens. That turns the photo into a file accurate to the millimeter. With the companion app for iPhone and Android you shoot directly, and calibration is already included for most devices.
What resolution should I scan a pattern at?
Scan at actual size and at least 300 dpi. For fine markings like notches or grain lines, 400 to 600 dpi is better. The files get large, that is normal.
How do I turn a scan into a vector file?
Open the scan in a vector program like Inkscape and trace the contour. Automatic tracing tools tend to pick up labels, folds and the lines of other sizes too, so you usually have to clean up by hand afterwards.
Can I digitize a multi-size sheet without cutting it?
Yes. Photograph the sheet with the Reference Tiles and trace the size you need in the PatternScan Pro editor. Scale and export work the same as with cut-out pieces.
Which file format do I need?
SVG for Illustrator, Inkscape and Affinity. DXF for pattern CAD like Grafis, Gerber or Lectra. PACX for CLO3D. PNG if an image is enough. Our sewing pattern glossary explains every format and term.
Try it with your own pattern!
How often do you really digitize? A single small piece: use the scanner you have. An archive full of sheets: ask a copy shop. Every day in production: look at a digitizing table. And if you regularly need patterns as clean files, in an atelier, in your studies or for your shop, try the photo way. One pattern, a smartphone and a printer are enough for the first test. Which other small tools connect craft and the digital world is in our post about three apps.
Rasmus is Co-Founder of PatternScan Pro and develops the app with a focus on precision and intuitive usability.

Digitize sewing patterns without tracing.
Test PatternScan Pro free for 14 days with the full feature set. You need your smartphone, a printer and one pattern you always wanted digital.

Photograph your paper pattern and get an automatically scaled digital version with PatternScan Pro.
Usage